Windows 10 Brightness Control Not Working: The Windows Brightness Control slider is a critical utility for Windows users. If it is not working correctly, it must be corrected quickly. The brightness control helps prevent eye strain and conserves battery life while working on a PC for extended periods. You may always change the brightness settings to meet your specific requirements. However, there are occasions when you are unable to adjust the brightness. If you are experiencing a similar problem, this guide is for you.
Typically, the brightness control not working error is caused by the display drivers or the power settings in Windows. Additionally, the first method to try if you cannot control the brightness of your windows is to restart your PC or apply for Windows updates. If you are still unable to utilize a brightness control slider after using these simple methods, check reading.
How To Fix Windows 10 Brightness Control Slider Not Working
This section will address the following topics:
1 – Update Display Adapters Drivers
2 – Enable Adaptive Brightness
3 – Enable PnP Monitor
4 – Update The Registry
Update Display Adapter Drivers
The first way to fix the brightness control not working on Windows 10 is by updating the Display Adapter This may be accomplished manually in the following manner:
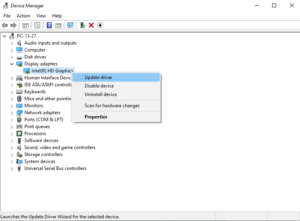
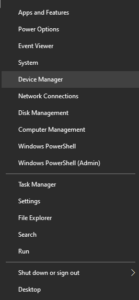
1 – From the Start Menu, navigate to Device Manager.
2 – Navigate to Display Adapters and click the arrow beside to expand the menu.
3 – Now, right-click on the available driver and select Update Driver.
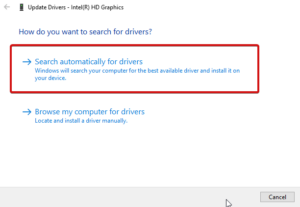
4 – Next, you’ll see a dialog box asking you to choose one option out of two.
5 – Here, select Automatically search for the updated driver software.
6 – Wait for the process to finish. Once done, restart your PC to apply changes.
Alternatively, we always recommend that you install an automatic Driver Updater on your PC to ensure that any outdated or corrupted drivers that require repair are updated quickly. This will prevent you from such random errors.
Enable Adaptive Brightness
Follow these steps below to enable Adaptive Brightness on Windows:
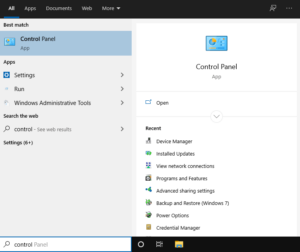
1 – Open Control Panel through the Start menu or the Search box.
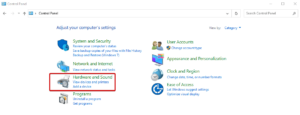
2 – Navigate to Hardware and Sound.
3 – Click on Power Options.
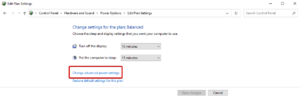
4 – On the following page, you’ll see Change plan settings highlighted in blue color. Click on it.
5 – Then, click on Change advanced power settings.
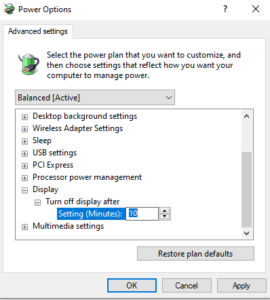
6 – On the new window, click on Display to open further options.
7 – Change the available options to the desired settings.
8 – Click Apply and then OK.
Enable PnP Monitor
If the previous method fails, you can enable the PnP monitor. This is how you do it:
1 – Open the Run window by pressing Win+R keys simultaneously. Now, type devmgmt.msc to open Windows Device Manager.
2 – Now, click on Monitors and expand the menu.
3 – Here, you’ll see a Generic PnP monitor. Right-click it to check whether it is enabled.
4 – If this is not the case, click on Enabled device. Disable it if it is enabled.
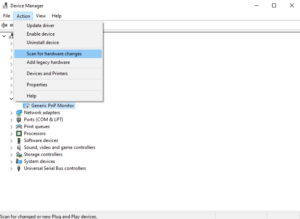
5 – Now, navigate to the Action tab at the top of the Device Manager.
6 – After that, choose Scan for hardware changes.
7 – Run the Scan.
That is it.
Update The Registry
The final method in our guide that you can use to fix brightness not working on Windows is through Registry update.
Note: Please note that updating the Registry will note significant changes to your PC. If not carried out appropriately, significant complications may develop.
Follow the steps below to continue updating the Registry:
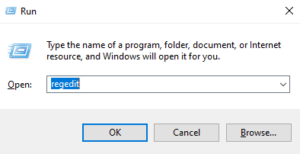
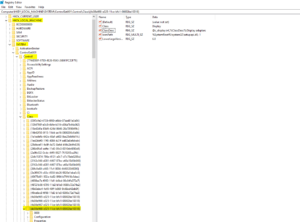
1 – Using the Win+R keys together, open the Run window. To open Registry Editor, type Regedit.
2 – Navigate to the HKEY_LOCAL_MACHINE.
3 – Select System > ControlSet001 > Control.
4 – Now, Select Class {4d36e968-e325-11ce-bfc1-08002be10318}000.
5 – Next, set FeatureTestControl DWORD’s value data to 0000ffff.
This should resolve the problem of the brightness not working.
The Bottom Line:
Although any manual method of updating the display driver will fix the error of the brightness not working. If this does not fix, further methods are indicated in the article. You can test them out and contact us with any questions or recommendations.


